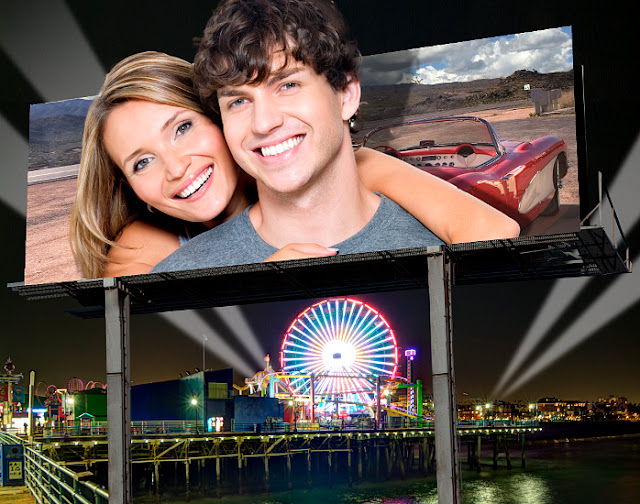
So, what comes to mind when we think of an impactful way to make an important visual announcement that all can see from near and far? A hint would be: "Will You Marry Me?" That's right. I'm thinking BillBoards! What better way to make your client, family member or friend the "Star of the Show" than to plaster them all over a billboard? Right? The good news is that you don't have to rent one, thanks to StudioMagic's PhotoBoards. Let's take a look at how simple it is to get someone you know up on their very own billboard.

Above you see a finished PhotoBoard and the first unusual but totally cool thing you'll notice is that
the subjects are so (here it comes again) "Larger Than Life" that the edges of the billboard can't contain them. Let's see how we can produce this with the help of StudioMagic I and we'll even take it a bit further to knock it out of the park with a little "one-click" accent from StudioMagic II. Let's go!
To start, we need to cut out our subjects from the original photo. Just a note that a simple empty background is best. For that we'll go to StudioMagic I's CutOut feature. I'll open it up and using my "quick selection" tool in Photoshop, make a few swipes at the background so it looks something like this:
Once I've got all of the background selected, and judging by all the detail the edges have due to the hair, I'm going to click the "Detailed CutOut" button and make sure the "ProMask" button is checked. What that'll do is give us a mask when it's all said and done so we can have the luxury of tweaking the edges after the fact if we need too. Once we click "Detailed Cutout", the "Refine Edge" dialogue box appears. It may look complicated but StudioMagic 1 chooses the best settings for you to get you going...
...and this is what we get when we click "OK". If we like the quality of our mask, then we can right-click on our layer mask to apply the effects of the mask. But hold off if it still needs a tweak here or there. Simply paint on the mask with white to reveal more of the photo, or less by painting with black. Then right-click on the mask and choose "Apply Layer Mask." The mask then goes "bye-bye" since its work is now done.
Now with the layer of our subjects selected, let's copy the contents of that layer so we can paste it into the PhotoBoard image by going up the the "Edit" menu then down to "Copy". I prefer keyboard shortcuts so I use "control (pc) / command (mac) along with the "C" key but here's the menu:
Back in our PhotoBoard image, let's command/control click on the "Paste Outside" layer's mask. This will select the area defined by the mask and lets us see the space our models will occupy once pasted back in. Note the marching ants surrounding that space:
To paste the copied image on the billboard we do the following:
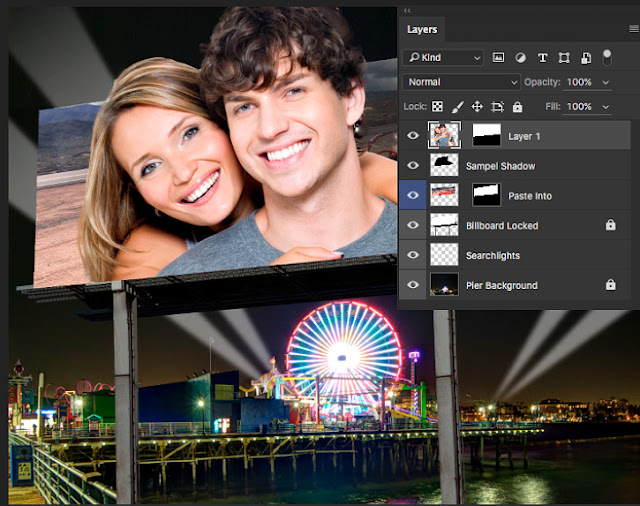
And voila! Into the PhotoBoard they go with their very own layer mask to prevent them from poking out the bottom of the billboard! See? Right there on "Layer 1". You can now resize using the transform tool (command/control "T") and/or move them with your move tool to get them sitting in the board just right.
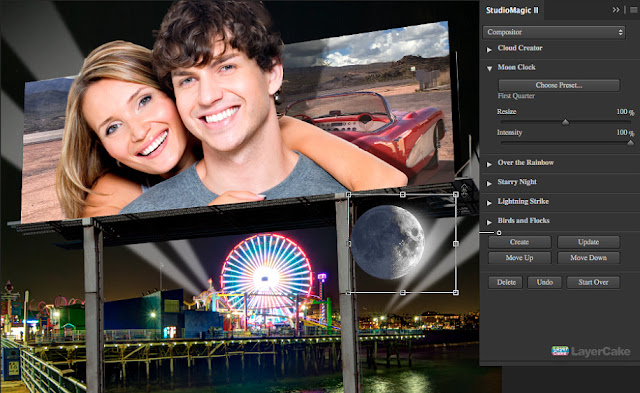
Now as I mentioned early on, I said we'd use StudioMagic II at the very end to give this image a little something extra. So let's pop it open and spice things up just a bit. As I look at this scene, I'm thinking "night time" and what comes to mind?... the moon! So let's do it. Let's head down to the "MoonClock" section under the "Compositor" dropdown menu. I'll click "choose preset" and let's feast our eyes on all the various moon phases. Once I choose one, I click "create" and there it is! All that's left to do is resize by moving the "Resize" slider and "update" or if you prefer, with the transform tool (command/control "T") and drag the corner handle while holding the "Shift" key to keep the proportions correct. When done, hit "Enter/Return" and you've sealed the deal. We could even pop open the "Starry Night" dropdown and sprinkle stars all over the night sky with a single click but you get the idea. Let the image tell you what it needs and know that StudioMagic delivers!
Easy. I told you! And here's our final image:
But is doesn't end there, folks. Remember that with the aid of SM I & II you can really take these images to a whole new place by applying your imagination. Think atmosphere as in sun, clouds, fog, painting with light. That and so much more awaits you. Oh, and I forgot to point out that yes, there is a shadow layer behind our subjects. As if extending beyond the billboard to make them pop out isn't enough, you could take advantage of the shadow, courtesy of StudioMagic I to make your models really jump out from the background even more.
So there you have it. StudioMagic PhotoBoards. Tons of different scenes in this package and a bunch of new ways to make some cool composites. Get creative. You could mix and match elements from the different scenes to create your own. So explore, create and most of all... Happy compositing!
To See tutorials on PhotoBoards, click here.


No comments:
Post a Comment